If you've followed my blog for awhile, you know that I really enjoy making garlands. I have made three (!) before and I will probably continue to make many, many more. The one I made today is probably my favorite so far. It took a lot of materials and tools to make this simple project, but I already had them all on hand, so this project didn't cost me a dime! Here's how I did it:
Here's what I used:
Computer, printer, paper, a pen, scissors, a box cutter, an embroidery needle, yarn, cardboard, tacky glue, water, pliers and magazines.
First, I printed the phrase "Seize the Day" off of my computer. I used Impact font in size 400. Since I didn't want to use a ton of black ink, I set it to the outline setting. After printing, I cut them out.
Then I grabbed a big piece of cardboard. Mine was an old Ramen box and it was slightly corrugated. I traced around the letters I had printed...
...And then cut them out. You can see in the previous pictures that I only printed out one E, but I traced and cut three of them out of the cardboard. This was merely to save printer ink.
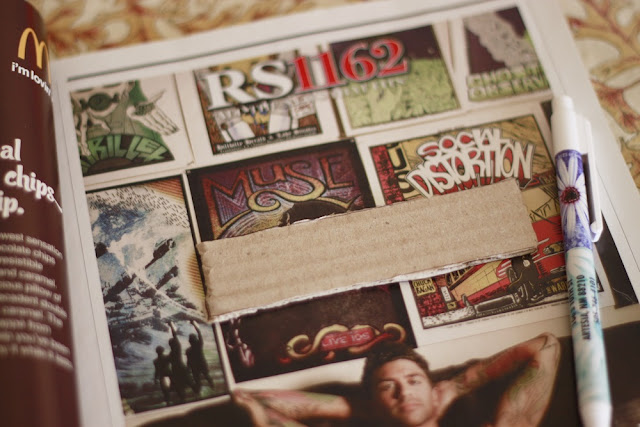
Then I found some colorful, chaotic or whatever-I-thought-was-cool scenes from some magazine pages. I placed a letter over the cool picture, traced it and then cut it out to match the letter.
I did that for every single letter. Some of them were black and white, while others had tons of color -- one was even a scene from my absolute favorite television show in the world, Breaking Bad (the last E in "seize").
After that, I mixed some tacky glue and some water. It would probably be easier to just buy decoupage glue (Mod Podge), but I didn't have any, so this is what I did. You could also mix water and Elmer's glue. I used my finger to get some glue onto the back of the magazine letter, and then I stuck it onto the cardboard letter, making sure it matched up perfectly.
After all the glue dried, I used an embroidery needle and some yarn to "sew" through each of the letters, making sure it was at roughly the same spot for all of the letters so they would hang evenly. I had to get out a pair of my boyfriend's pliers so I could pull the needle through a couple of times, but it wasn't too hard.
And then I hung it using some thumbtacks! It turned out pretty cool, but if I were to do it again, I think I would use something different than corrugated cardboard, as you can kind of see the corrugated ridges through the magazine pages. It works for now though!
Hope you're having a fantastic Sunday afternoon!
Love, Liz


This is so cute! I actually like the corrugated cardboard-- it gives it some unexpected texture that I like :)
ReplyDelete-Bonnie @ Revolutionaries
www.revolutionariesblog.com
Thank you so much Bonnie! :)
DeleteLiz
This is my favorite project you've done so far...I really love the process and the end result is really spectacular.
ReplyDeleteXo
Sarah
http://atticlace.blogspot.com
Oh wow, thanks Sarah! :)
DeleteLiz
Thanks Monica!
ReplyDeleteLiz
I love it! This is going on my to-do list!
ReplyDeleteAwesome! Let me know how it turns out for you.
DeleteLiz
That's such a cool idea for DIY, the outcome is wonderful!
ReplyDeleteMaybe you might consider following each other on GFC and Bloglovin? I will wait for you on my blog!
callmemaddie.blogspot.com
Thanks Maddie! I'll be sure to check your blog out.
DeleteLiz
following you now! :)
Deletei love that you used magazine photos for this, so cool!
ReplyDeleteThanks! I thought about using fabric at first, then thought of the great idea to use real pictures, of my friends and I! But I didn't have any printed that I wanted to cut up, so maybe I'll try that next.
DeleteLiz
Thanks for the comment on my blog also following you. Loved the magazines and quote you used for this:)
ReplyDeleteCharm Kindred Spirit
Bringing love of vintage fashion, my photography and Diy trinkets to the free spirited at heart.
Thank you so much! Your blog is great.
DeleteLiz
This is adorable! *.* Totally gonna do it with an beautiful phrase I read today, to put near my books :)
ReplyDeleteKisses
Sofia G
Awesome! Let me know how it turns out for you. :)
DeleteLiz
Very cool! I also like the corrugated cardboard, I think it's artsy!
ReplyDeleteThanks Emily! I've come to like it more today.
DeleteLiz
love this! i really want to make one now!
ReplyDelete~niki <3
http://youngandimmortal.blogspot.com/
Thanks Niki! And when you do, let me know how it looks!
DeleteLiz
I love making garlands too!! Love this one and it's also so inspirational. Great diy! New follower here, hope you can stop by my blog and follow if you like.
ReplyDeletexo erica
Awesome! Thanks for stopping by, Erica. I'll definitely check your blog out right now!
DeleteLiz
YES. I absolutely love this! I'll have to make one for my dorm!
ReplyDeletexoxo
Juliette Laura
juliettelaura.blogspot.com
Thanks so much Juliette! I think it's pretty cool... And so easy to make, am I right? Let me know how yours turns out. :)
DeleteLiz